
Banner del consenso ai cookie per Google Tag Manager
Semplifica le attività di conformità con Google Tag Manager integrando UniConsent. Aggiungi facilmente un banner del consenso ai cookie al tuo sito e garantisci il rispetto di GDPR, CCPA, LGPD, della normativa UE sui cookie e dei requisiti di Consent Mode.


Cosa è incluso
Implementation instructions for deploying the UniConsent Consent Management Platform for UniConsent web application users using Google Tag Manager container tags. This article details the steps to create a GTM account, install the tracking code, and import and configure the UniConsent label template.
This guide will show you how to:
1. Implement the cookie consent banner in Google Tag Manager
2. Control cookie-setting tags in Google Tag Manager
3. Google Consent Mode V2 for Google Tags
The guide will also explains how to customize consent banner values, map key triggers, and block third-party scripts loaded through GTM.
Come configurarlo
You can easily set up the UniCosent CMP Tag on your website via Google Tag Manager using the UniConsent CMP Tag Template for GTM.
It is recommended to set up UniCosent CMP via Google Tag Manager if you are managing all your other tags with Google Tag Manager.
Google Tag Manager loads the UniCosent CMP Tag with the Consent Initialization - All Pages trigger. Then, use Consent Mode signals provided by the UniConsent CMP Tag to load your other tags in GTM.
1. Trova la licenza di UniConsent CMP
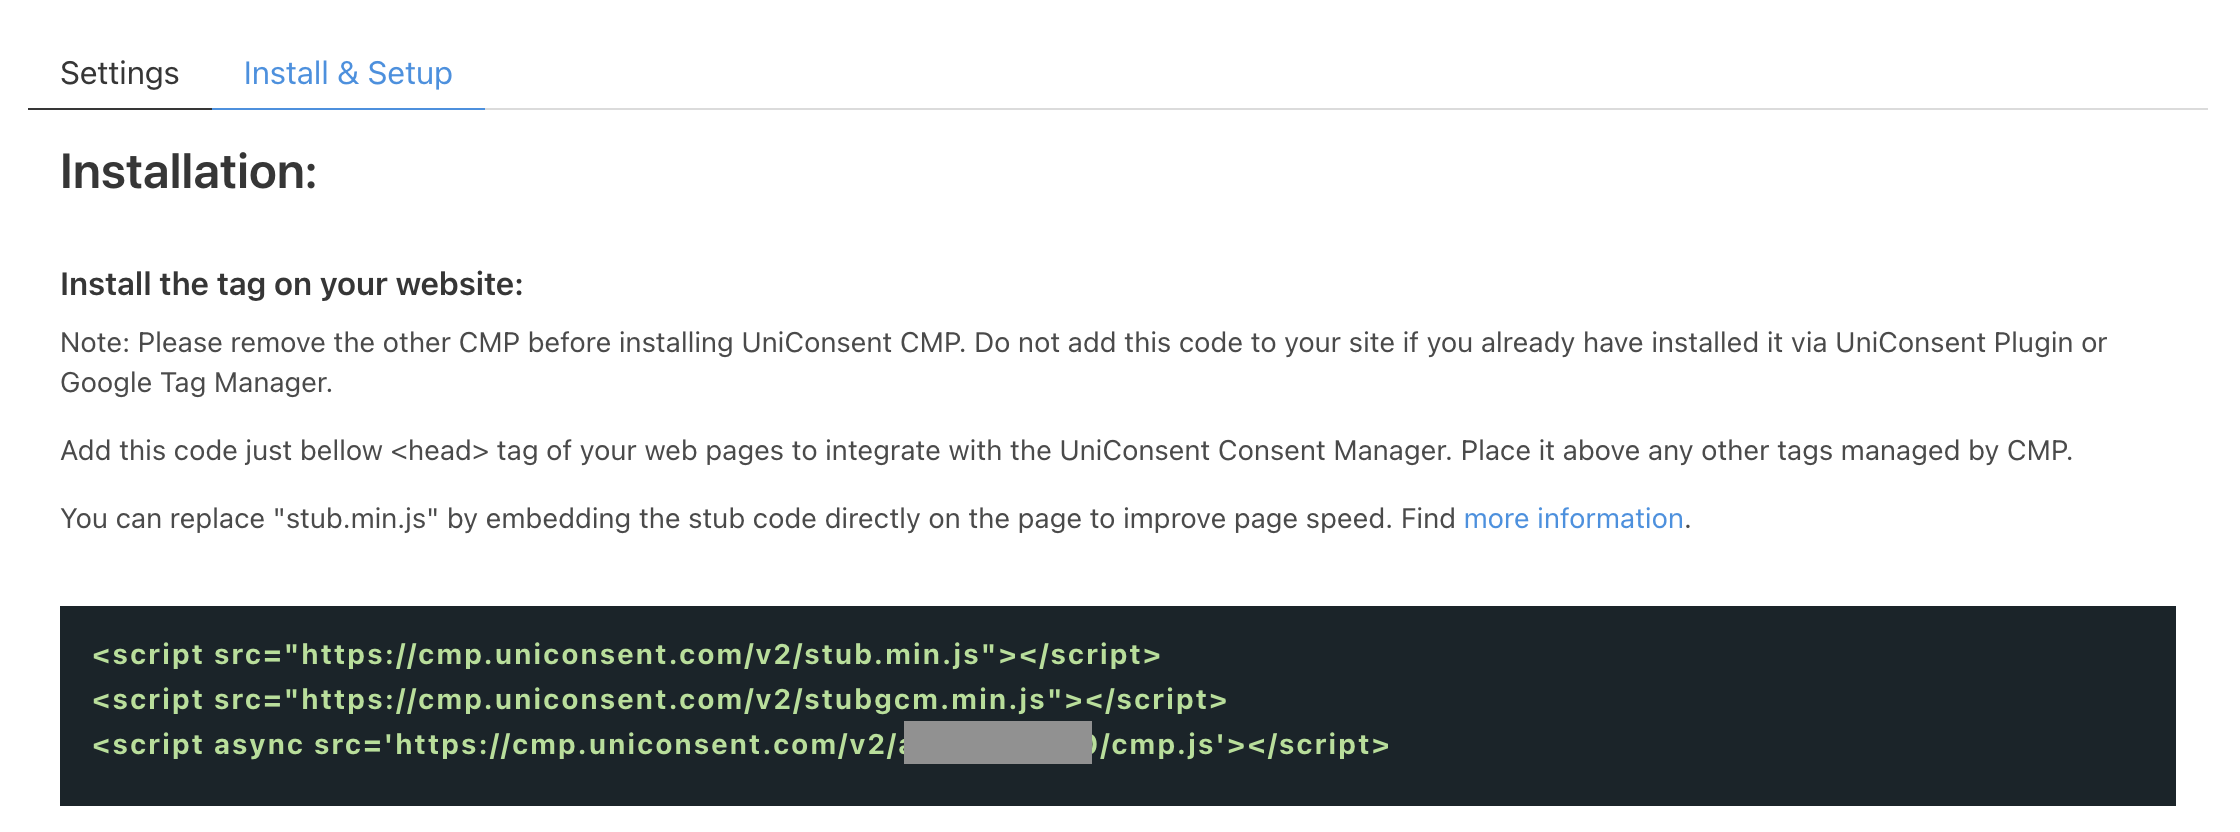
First, login to your UniConsent account, go to Consent Manager > My Websites, click Manage.
Second, click Install & Setup and find UniConsent CMP License to be used in Google Tag Manager.
2. Implementare il banner dei cookie in Google Tag Manager
First, Sign Up / Create a Google Tag Manager account. Find the Google Tag Manager container for your website, or create one if you are new to Google Tag Manager.
In Tag Manager, click the Accounts tab > Create Account.
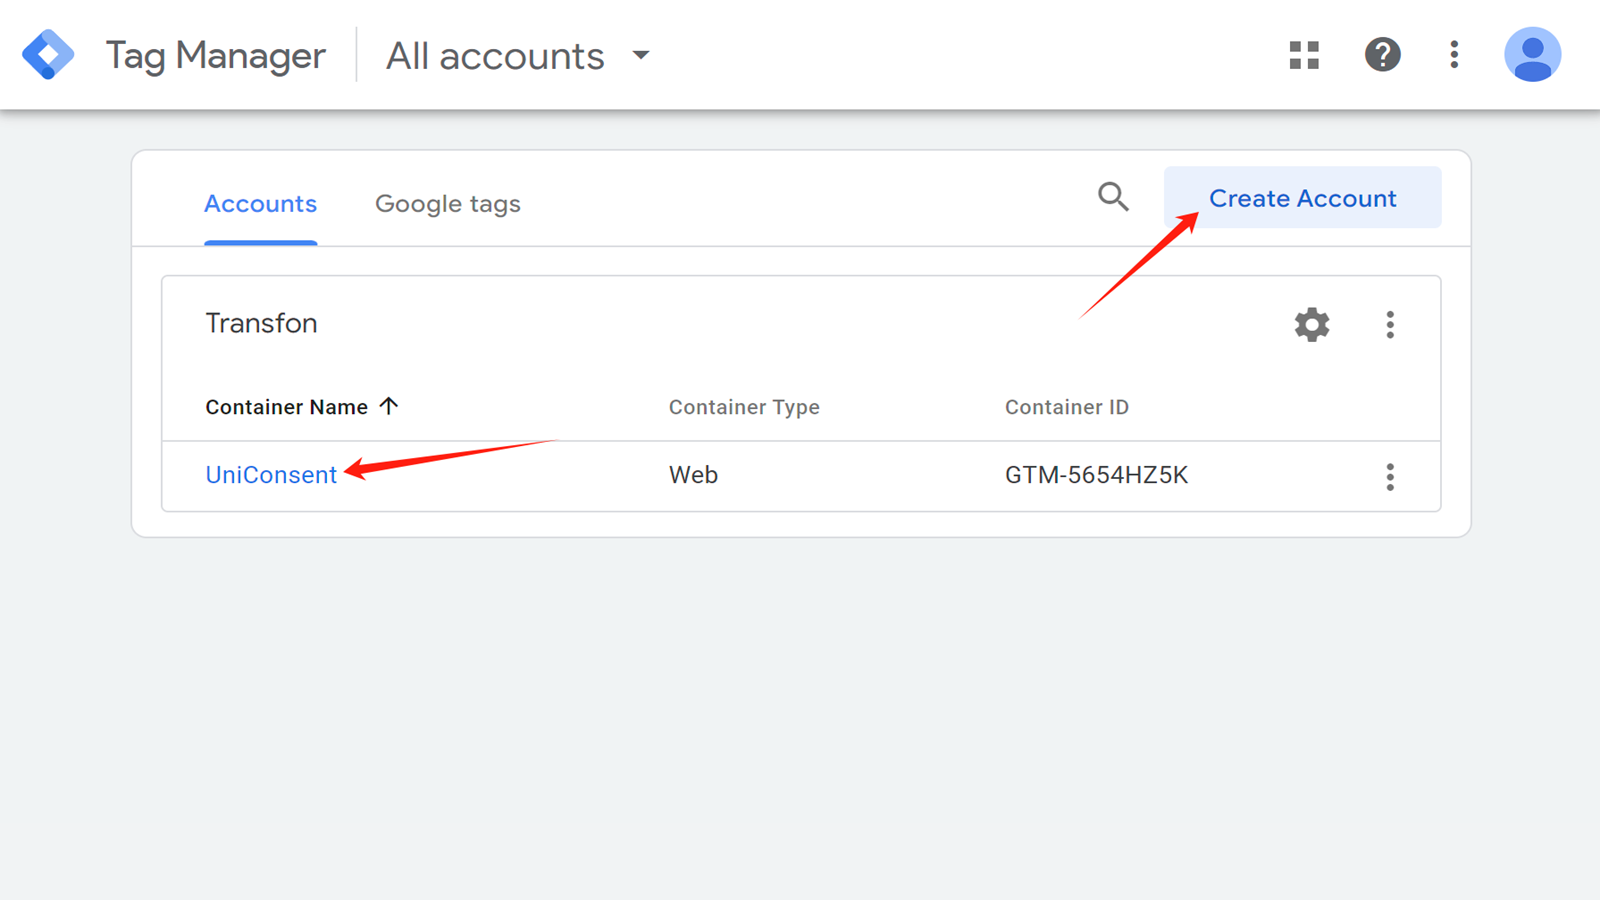
Enter an Account Name and select the Country for the account.
Enter the Container name and select the container type.
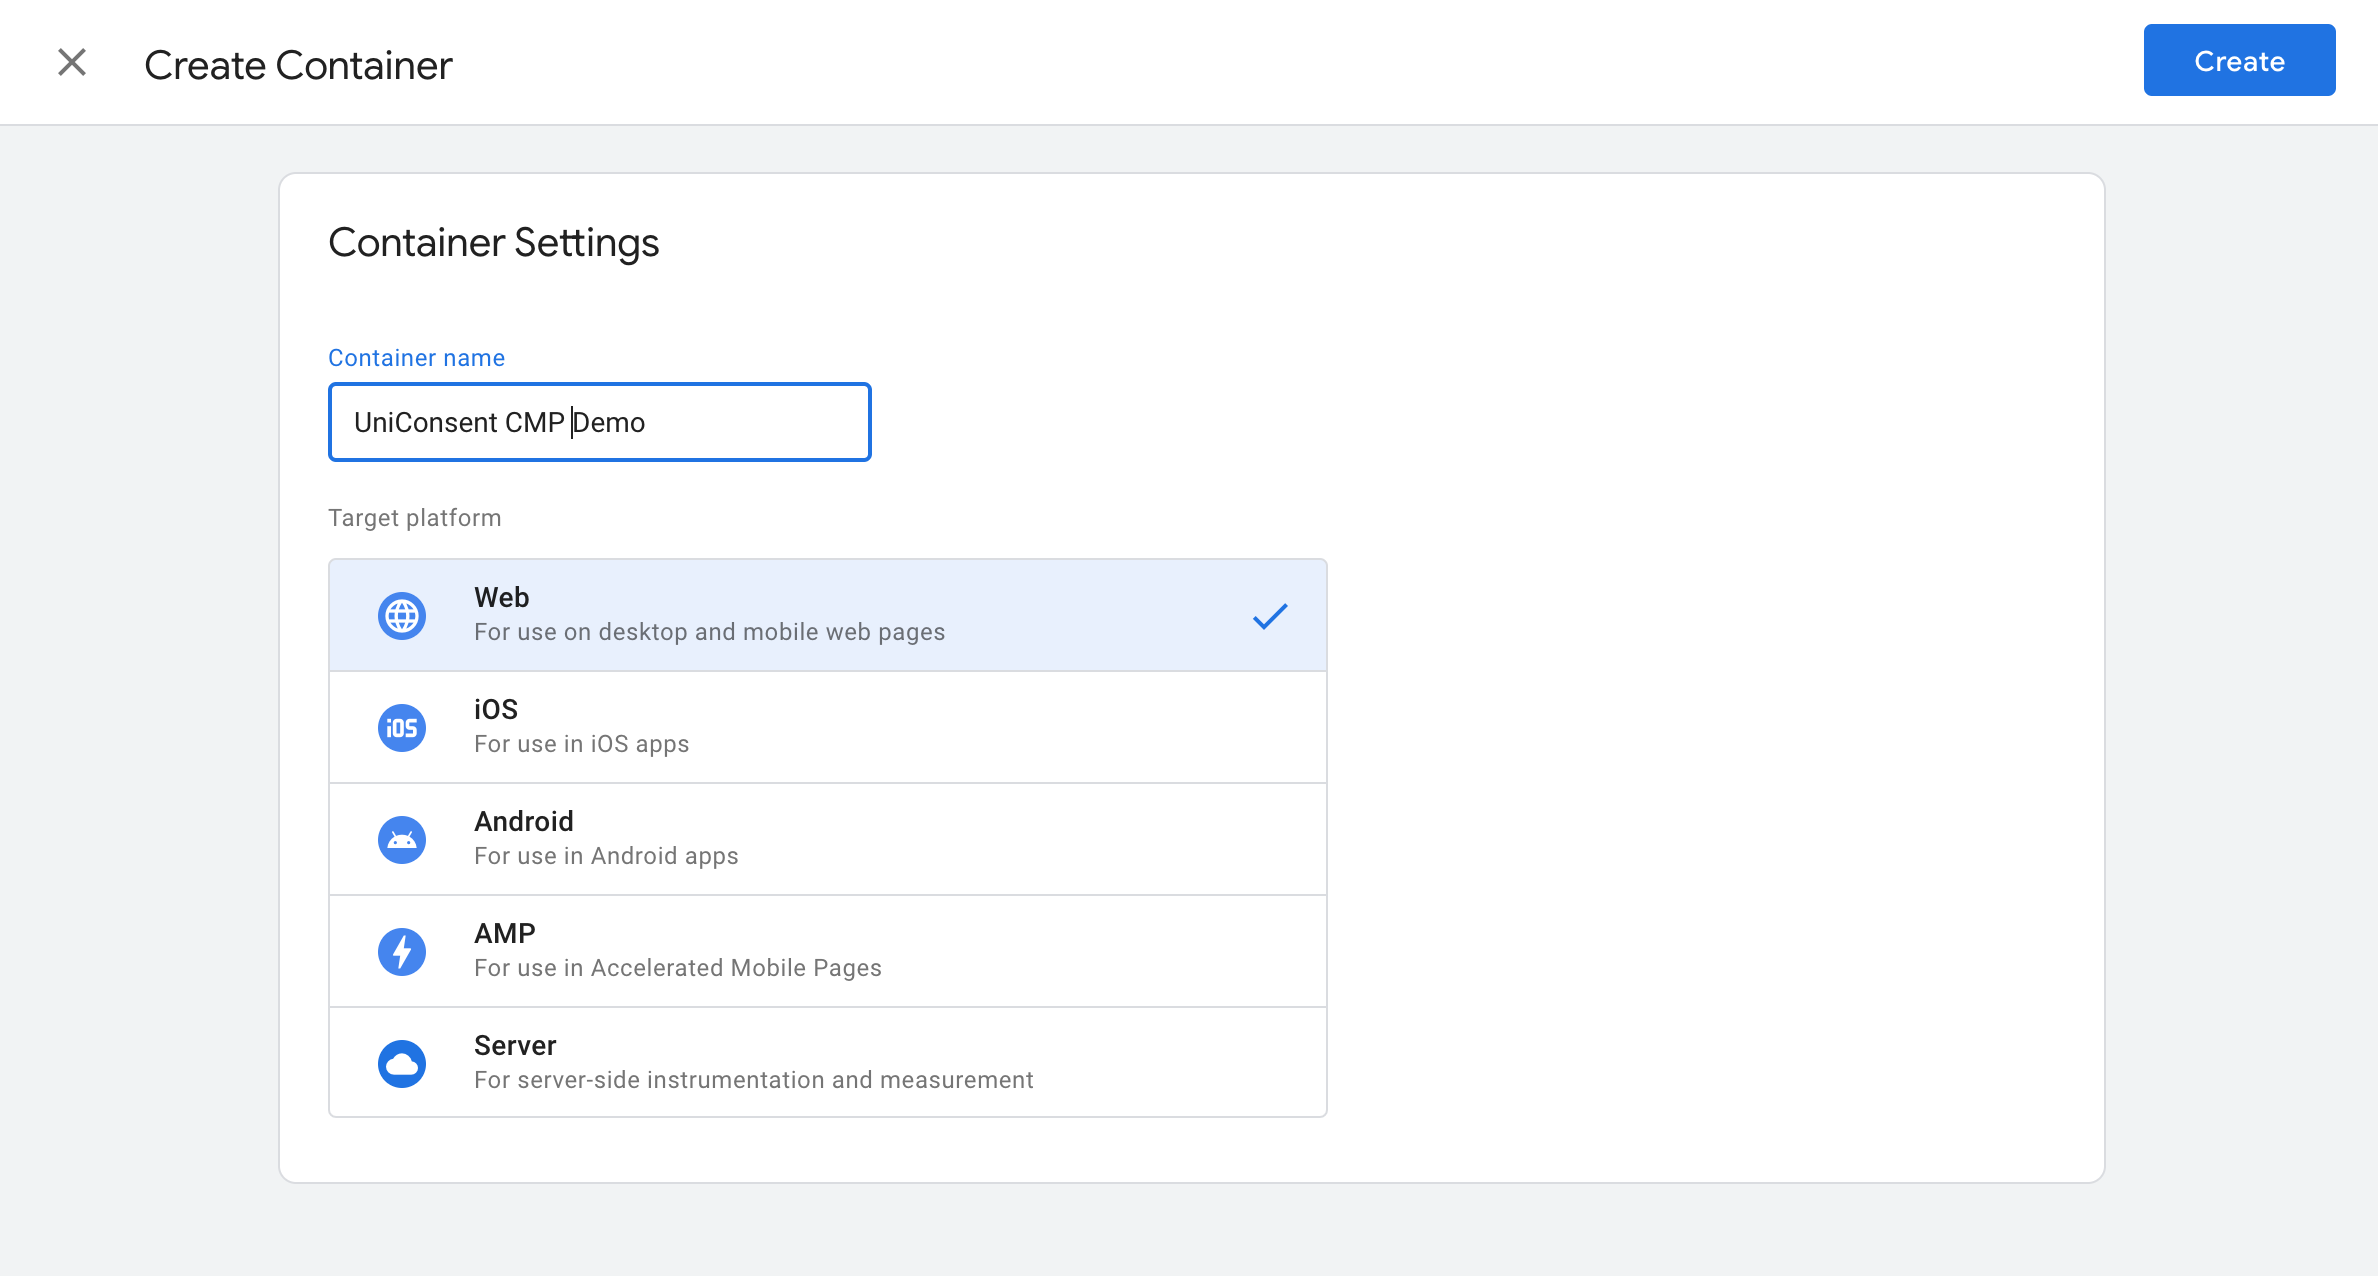
To create your container, click Create and agree to the Terms of Service.
Once the container is created, a modal will appear with two snippets of code to install on your site.

Copy and paste the first part of the container tag immediately after opening the head tag of your website and the second part of the second iframe part immediately after the opening of the body tag.
Then it's time to adding UniConsent CMP Template
2. Trova o aggiungi il modello UniConsent CMP
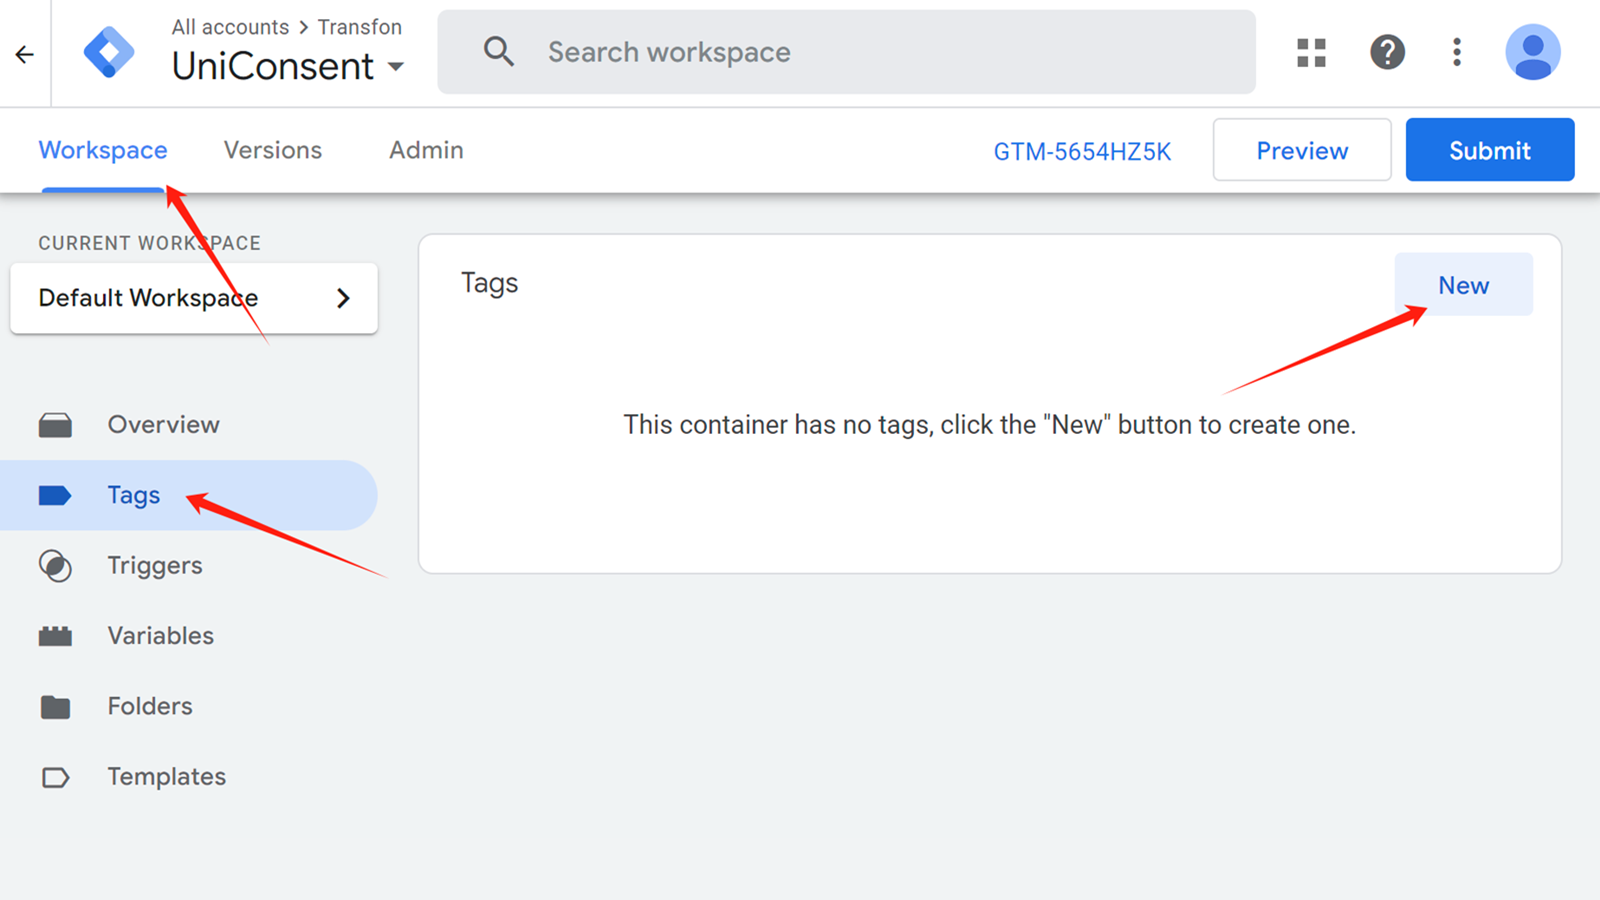
To add a tag, in Workspace > Tags click New.
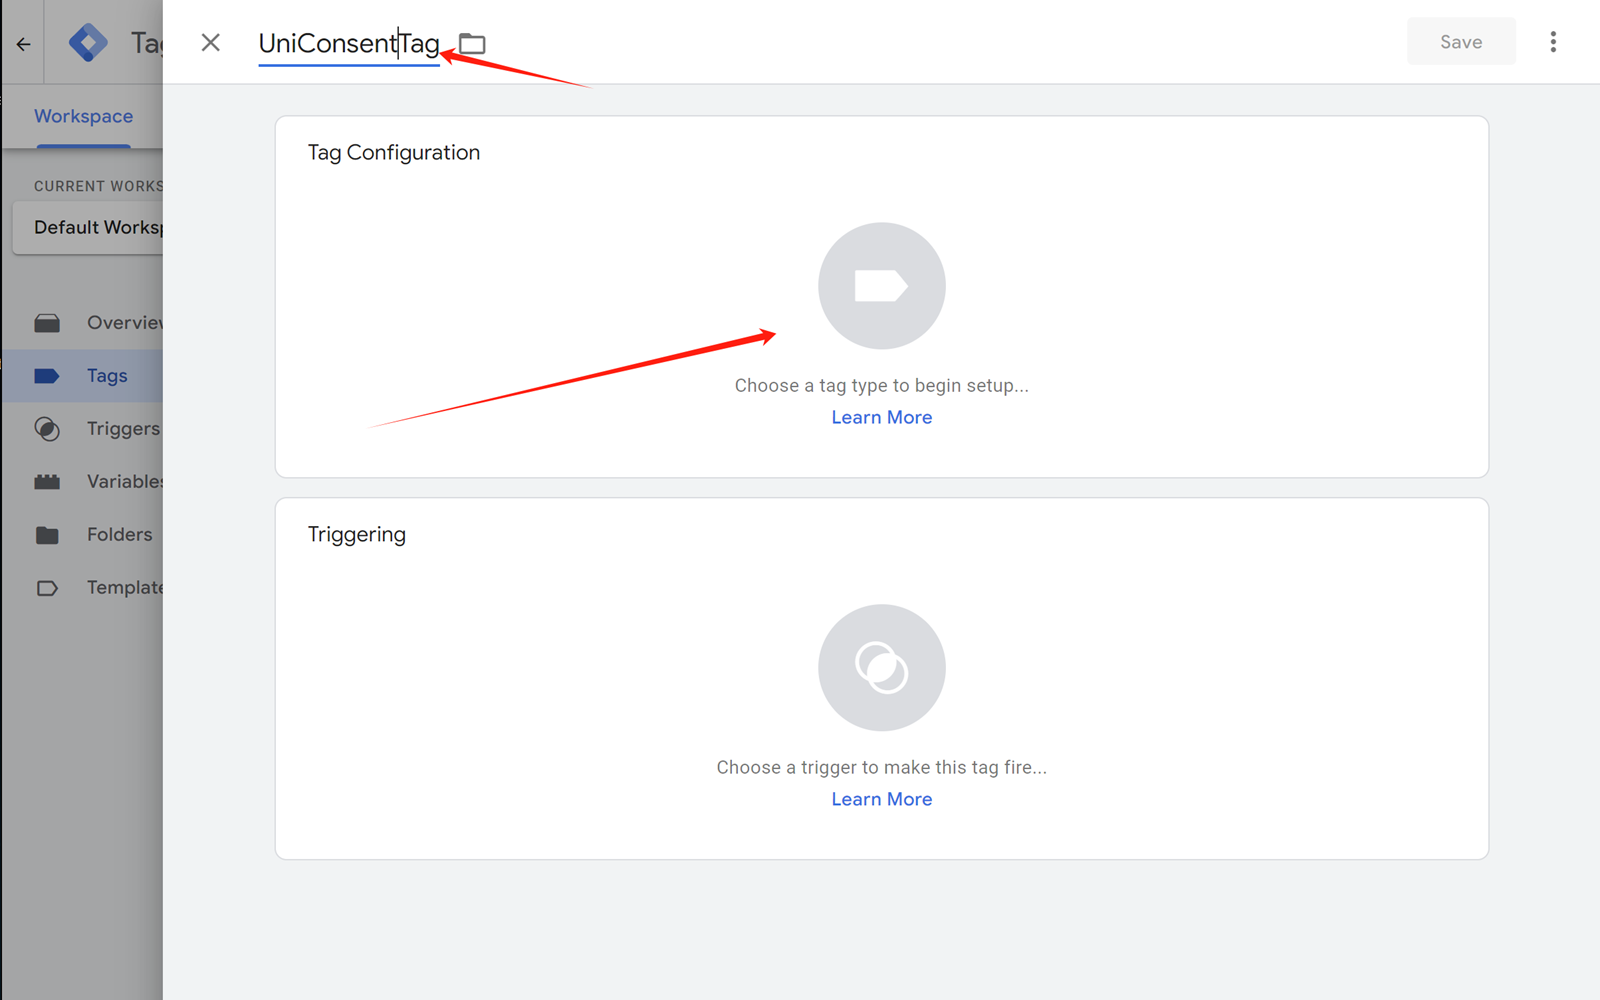
Enter the tag name and Click on Tag Configuration
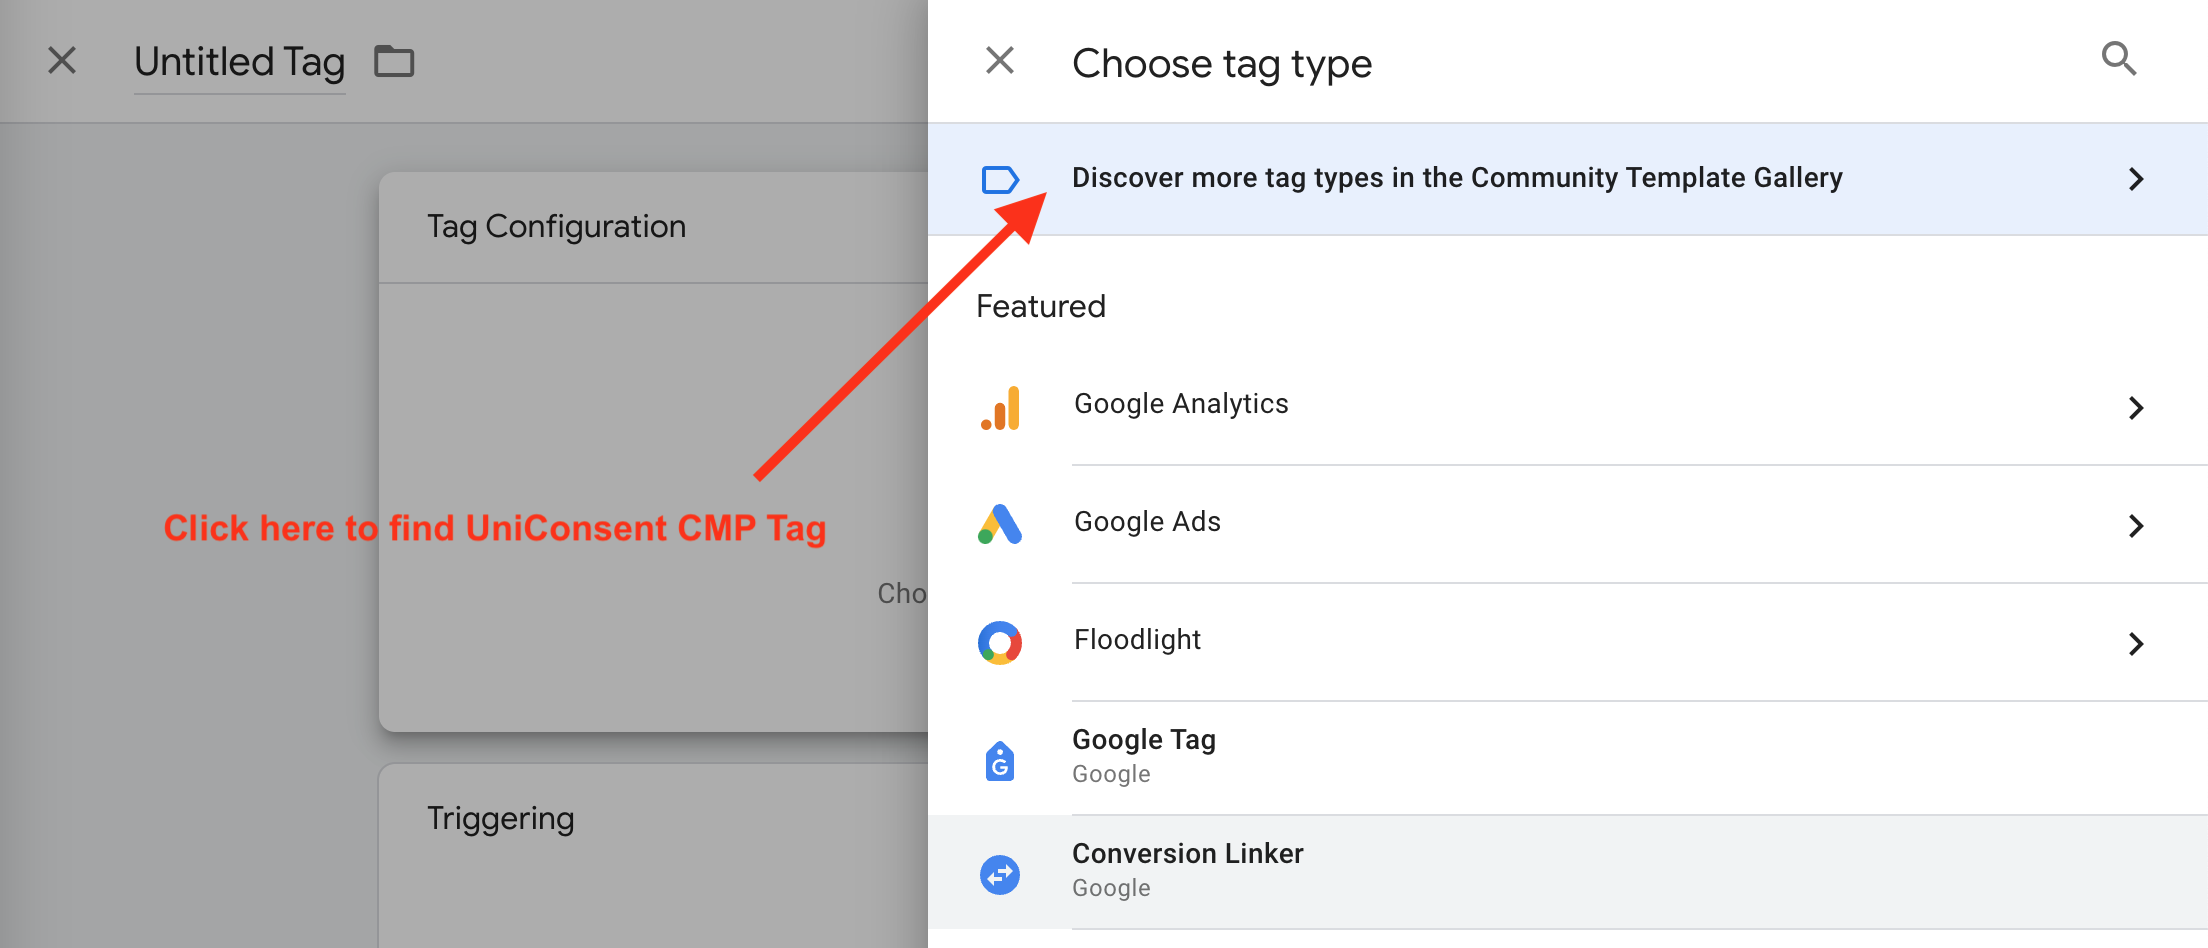
You can find the UniConsent Tag by clicking here or locate it manually.
Add a new tag to the Google Tag Manager container by clicking Discover more tag types in the Community Template Gallery.
Search for UniConsent and add it to your container.
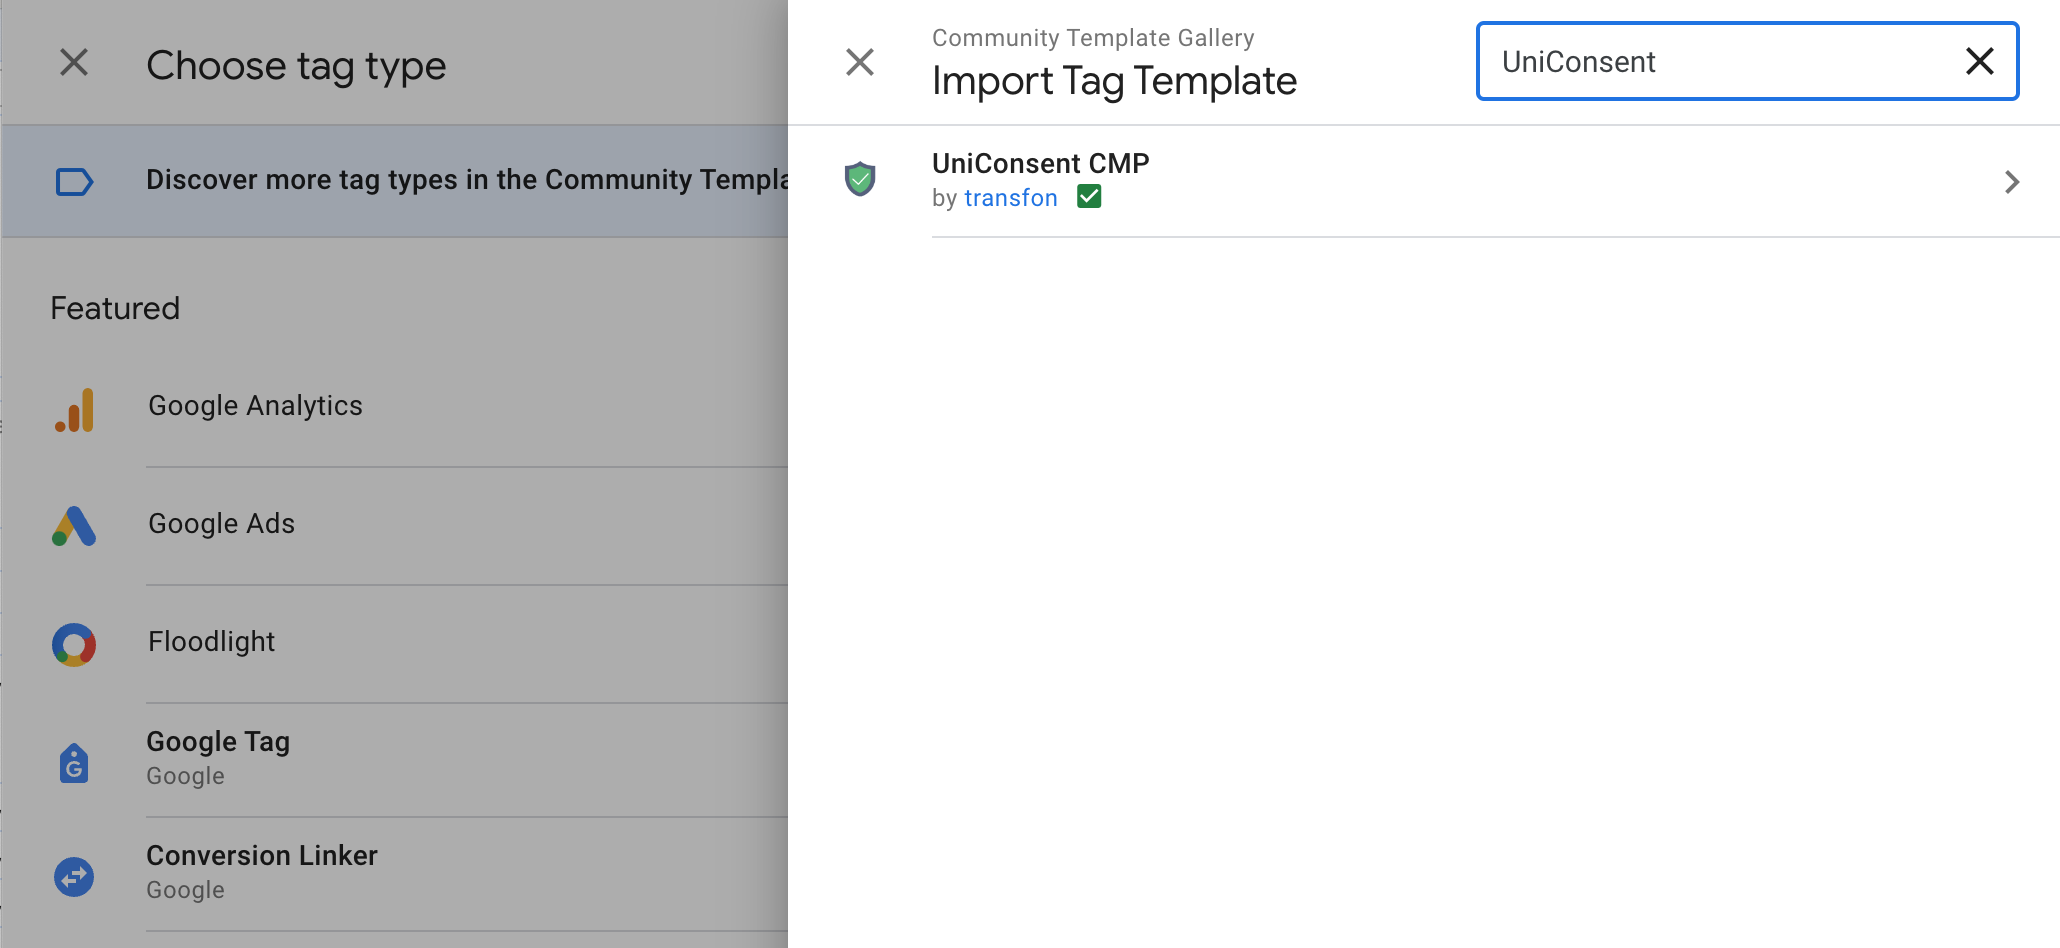
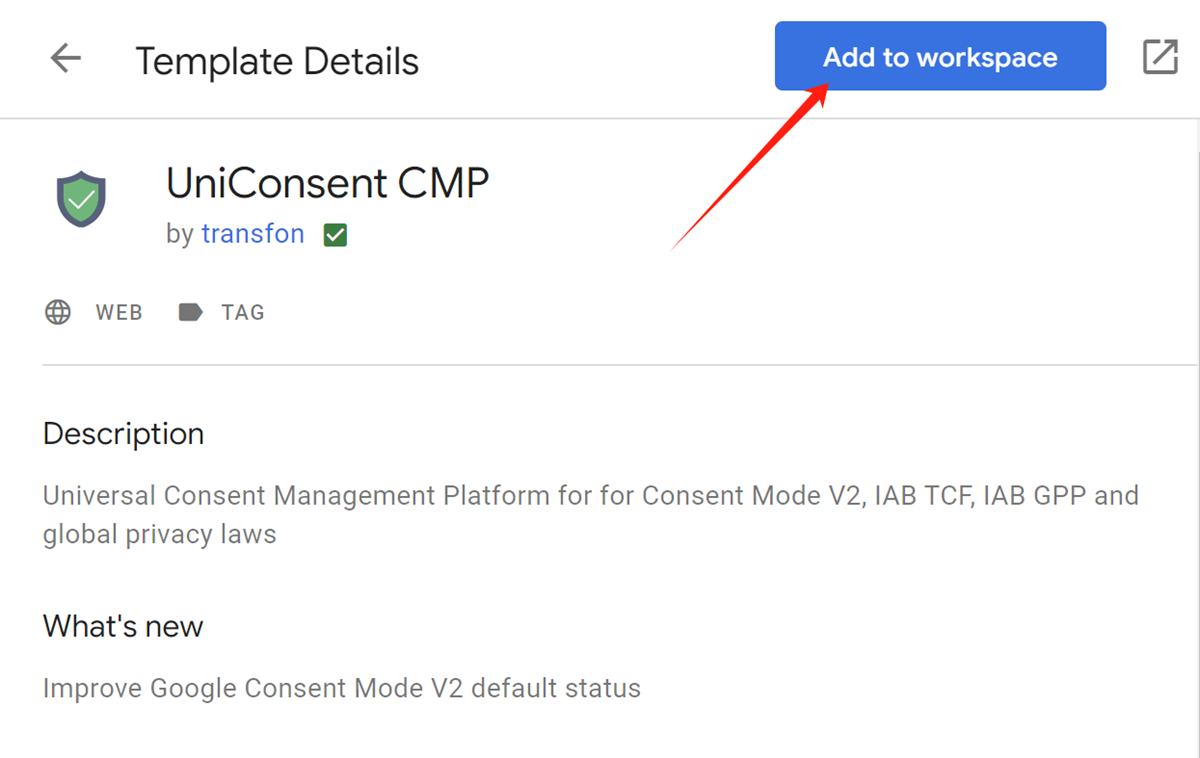
Choose the UniConsent CMP template and click Add to workspace > Add to add it to your GTM installation.
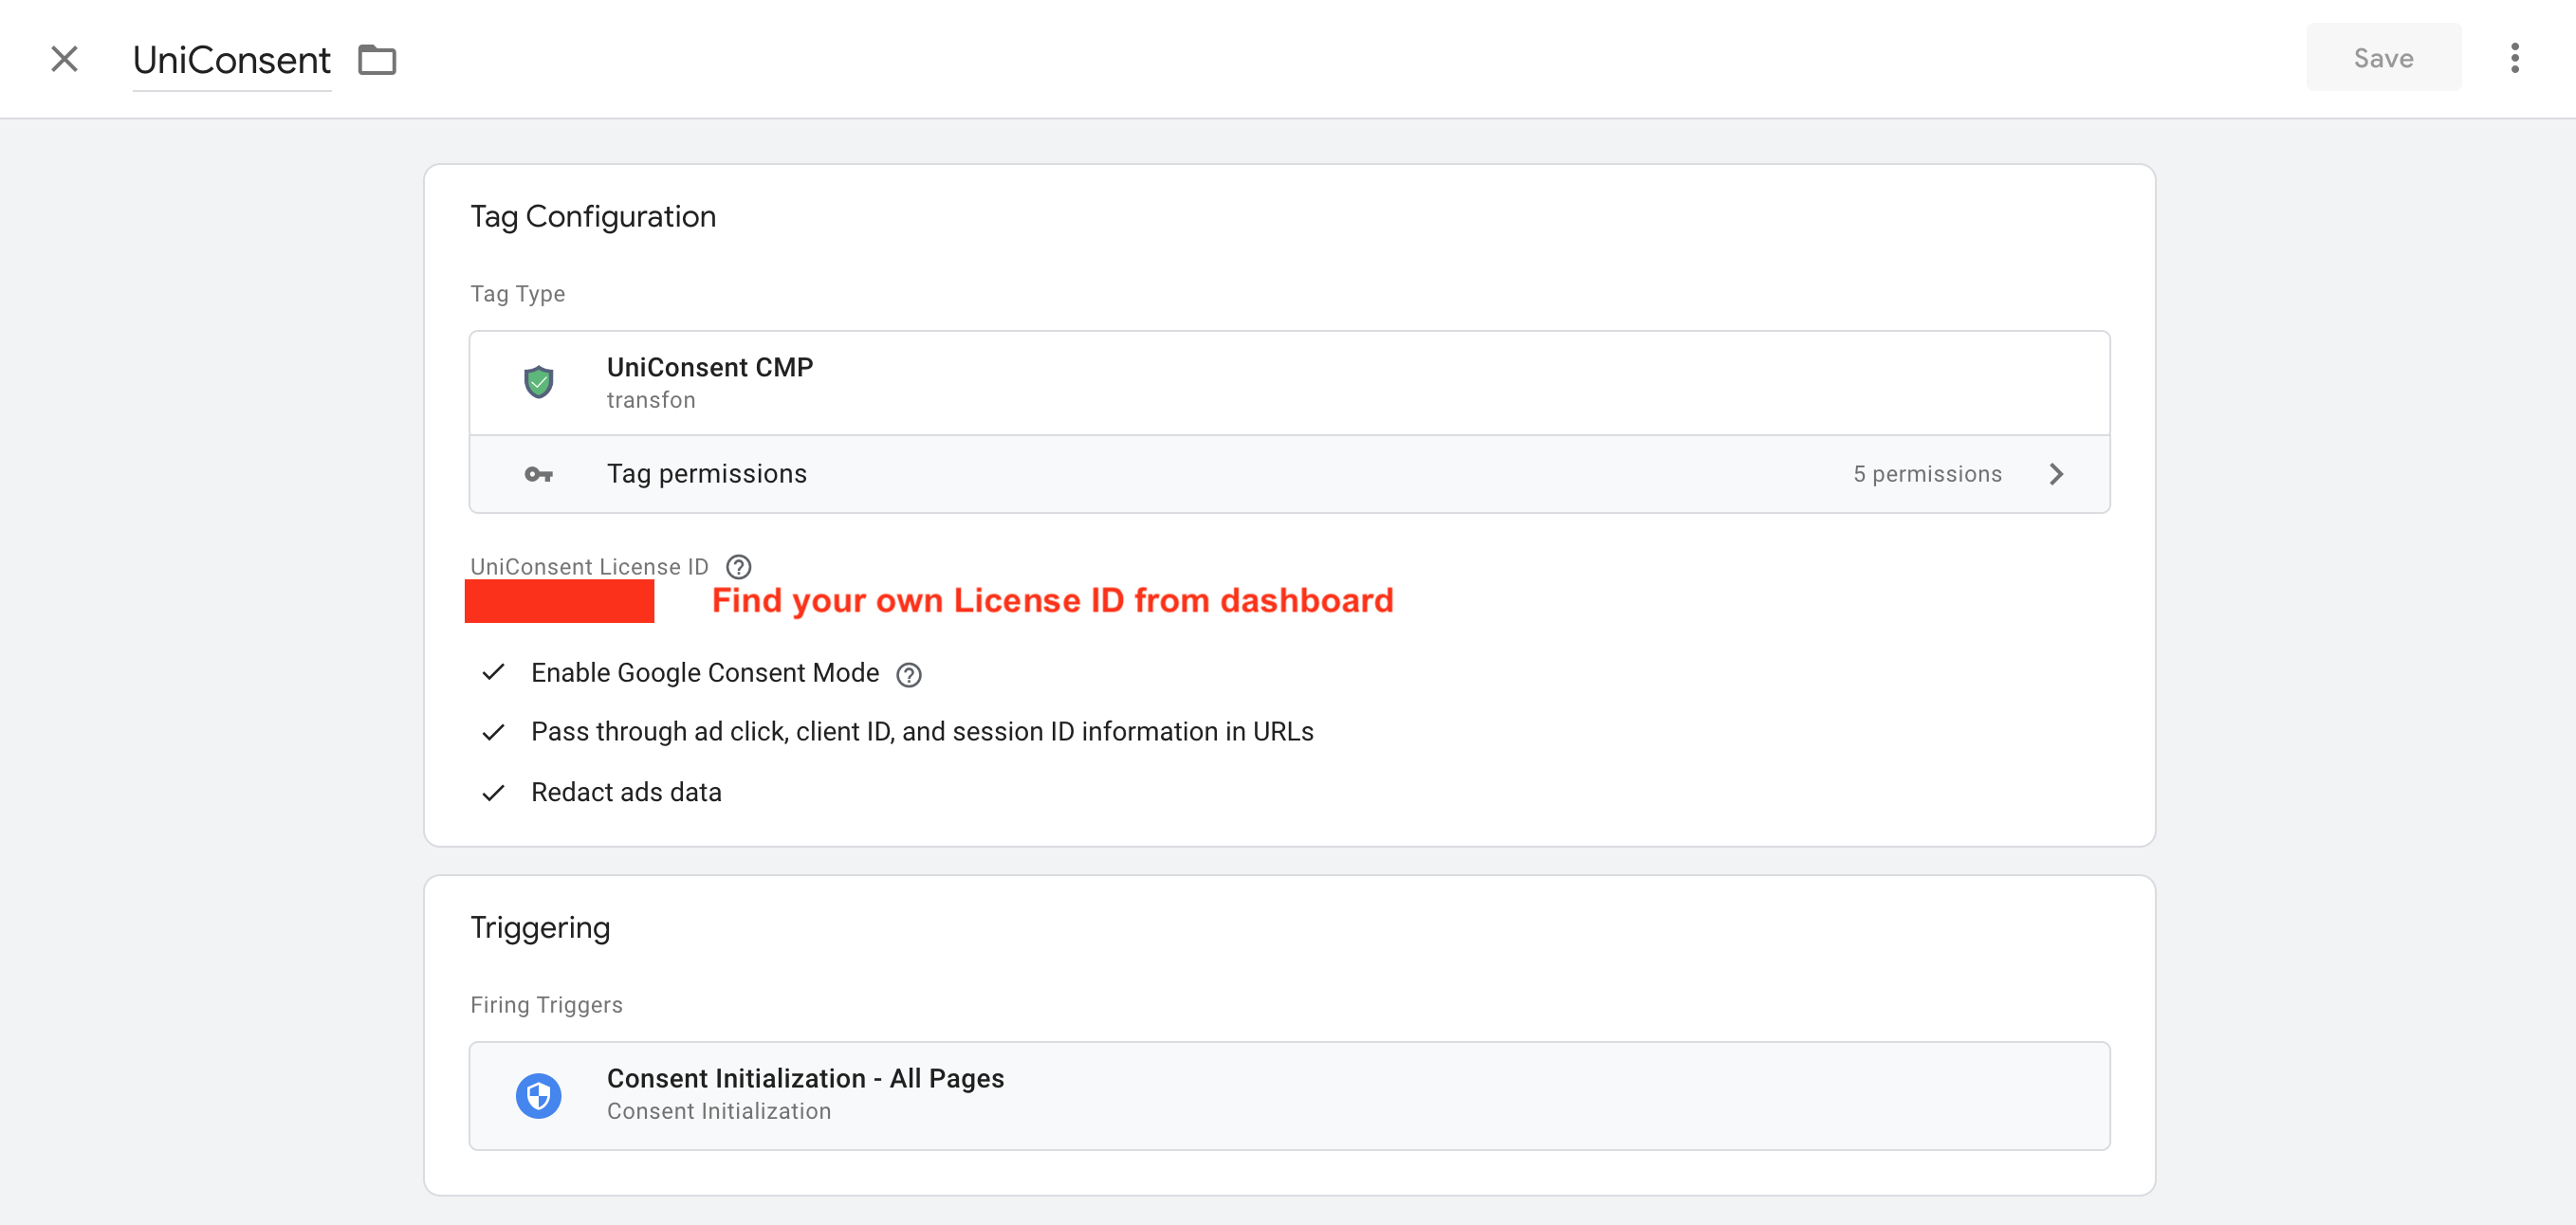
Use the Configuration tab to select a banner configuration based on your needs. Enter your site UniConsent License ID to set default consent settings and other settings.
The trigger should be Consent Initialization - All Pages.
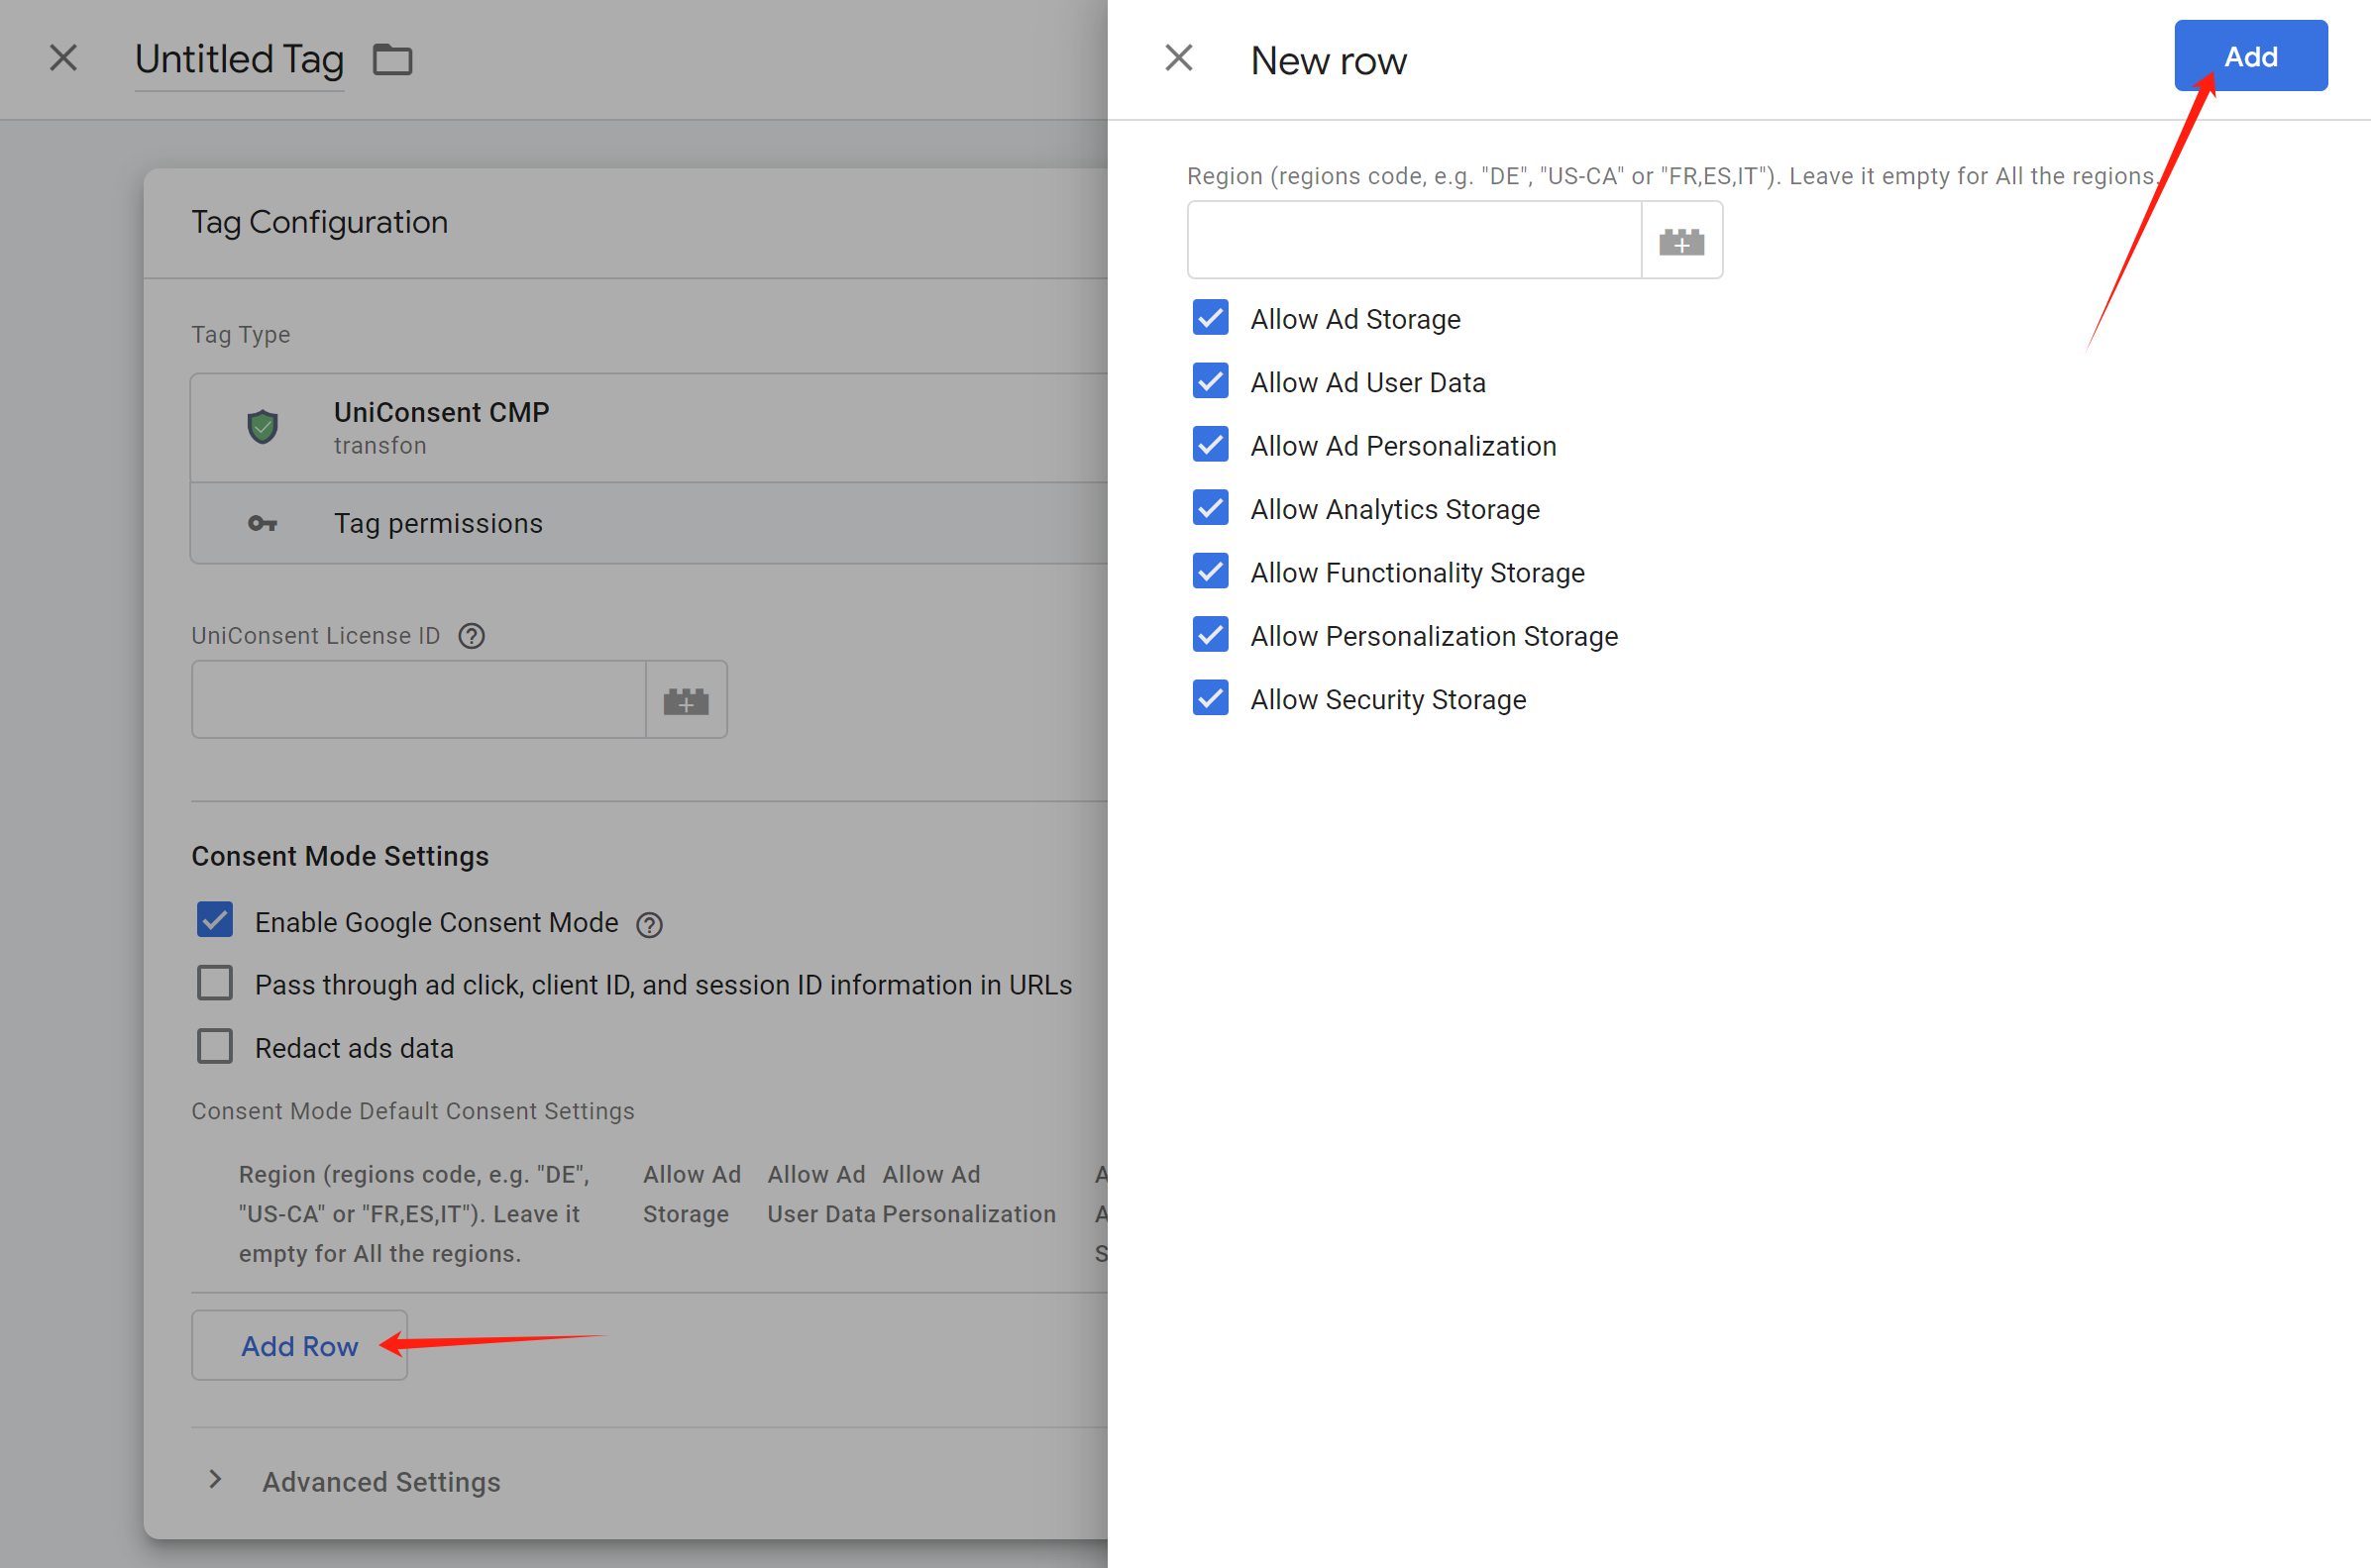
To add Default Consent Setting:
First, click Add Setting.
Second, depending on your requirements, select Enable/Deactivate from the drop-down list for each cookie category.
Set the region by entering the ISO standardized (ISO 3166-2) code for the specific region you want to geo-target with the banner. If you don't want your banner ads to target specific regions around the world, leave it empty for All the regions.
See the ISO 3166-2 standard for the corresponding region codes.
Then, click Add.
Finally, remember to publish the changes on your website and add the Google Tag Manager tag to your site based on the instructions.
3. Usa le impostazioni del consenso di Google Tag Manager per controllare i tag (modalità di base)
Then you can use Consent Mode signals to manage all the other tags.
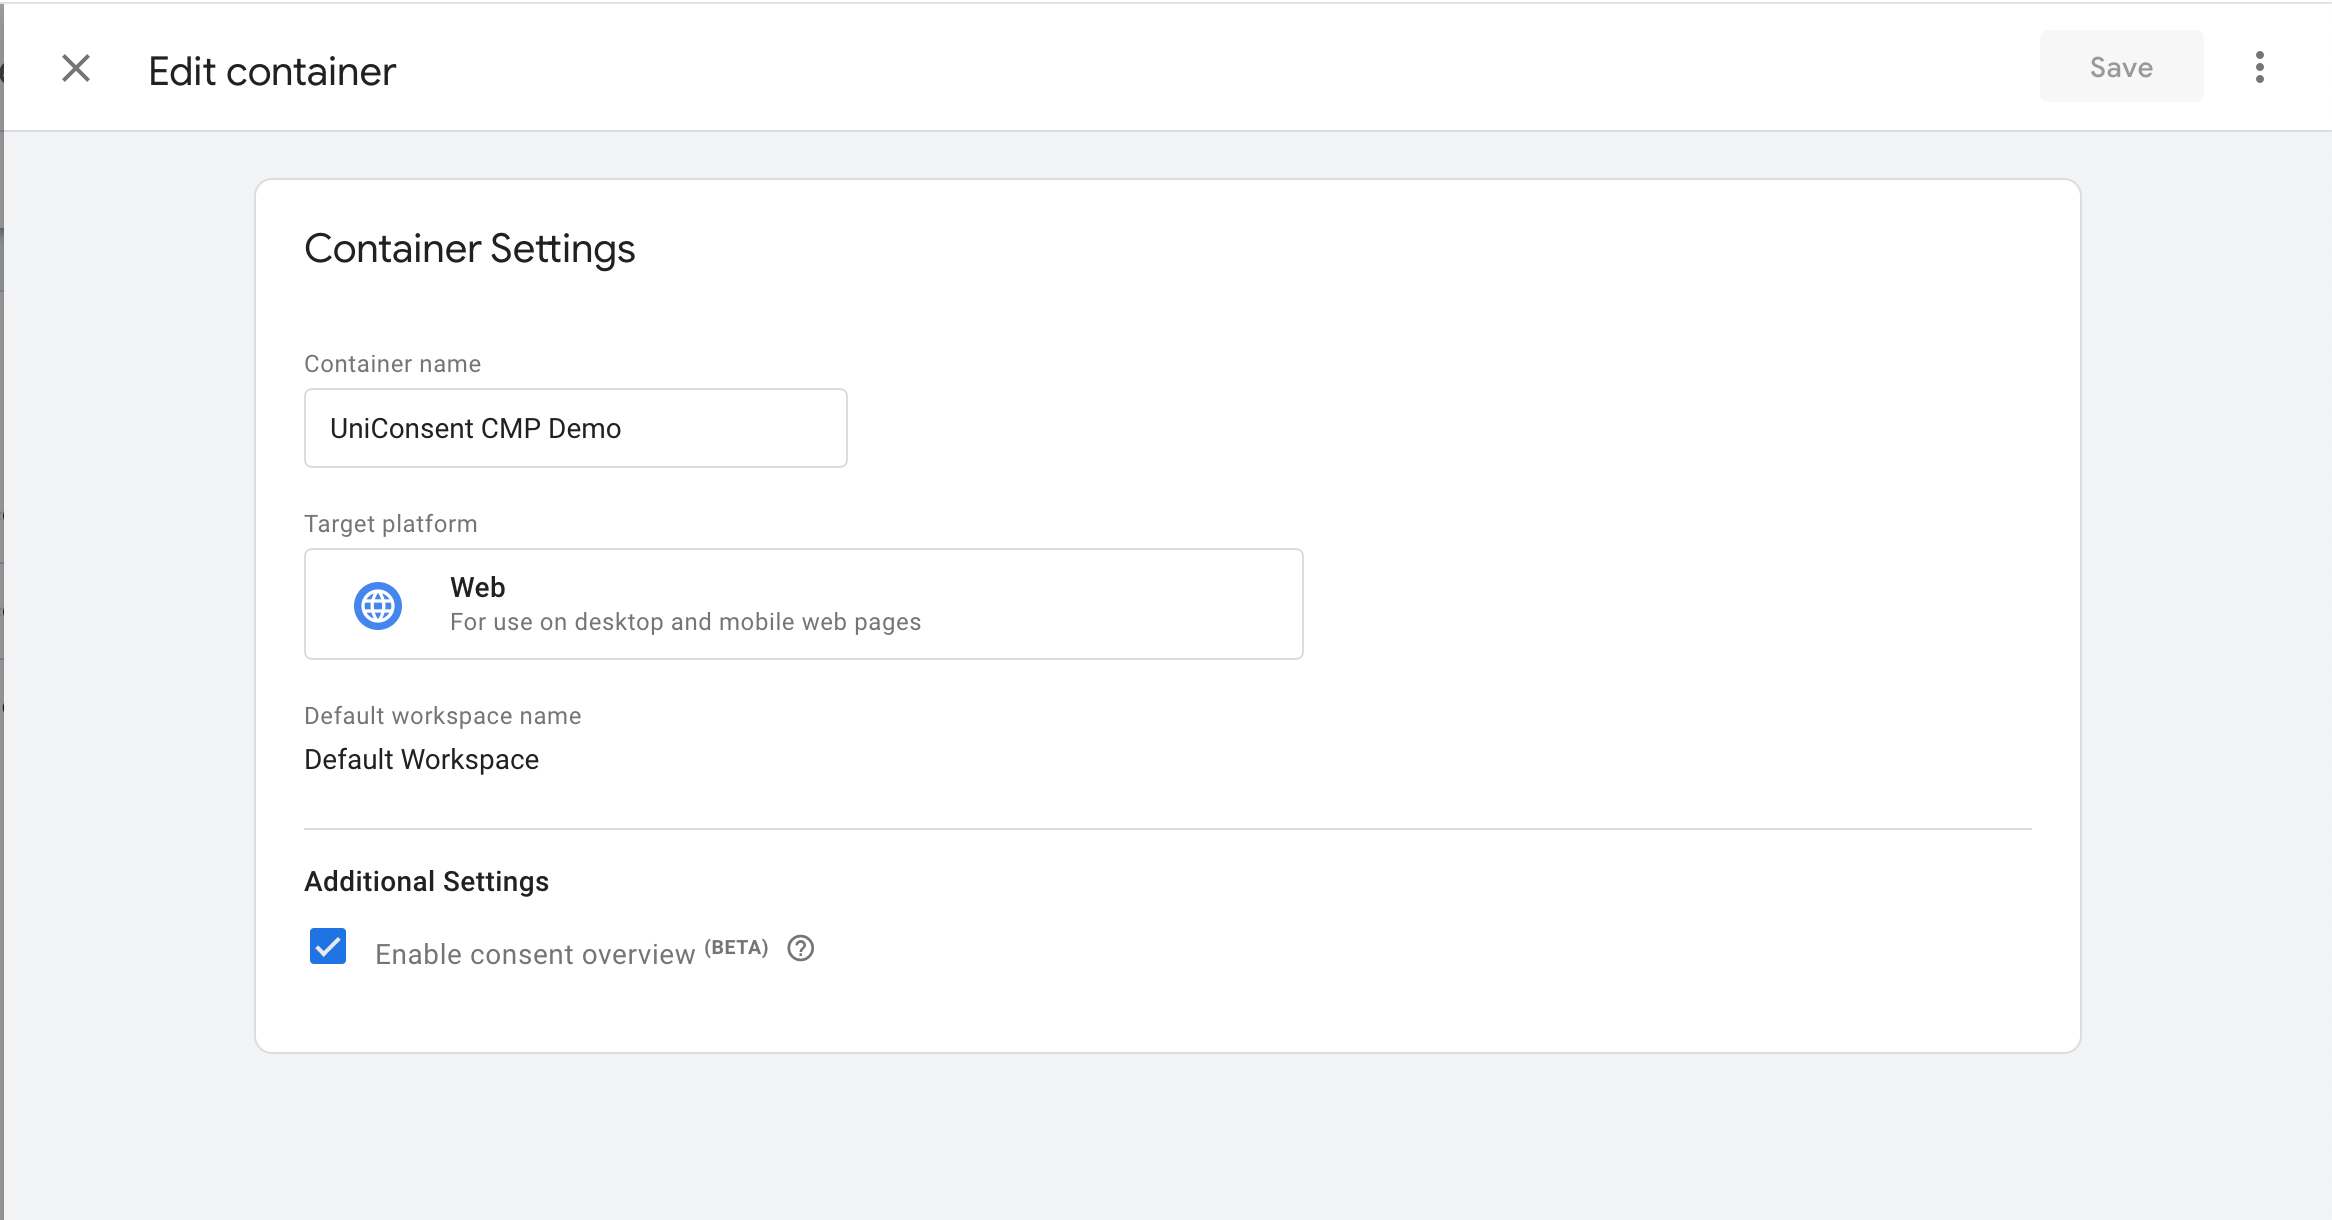
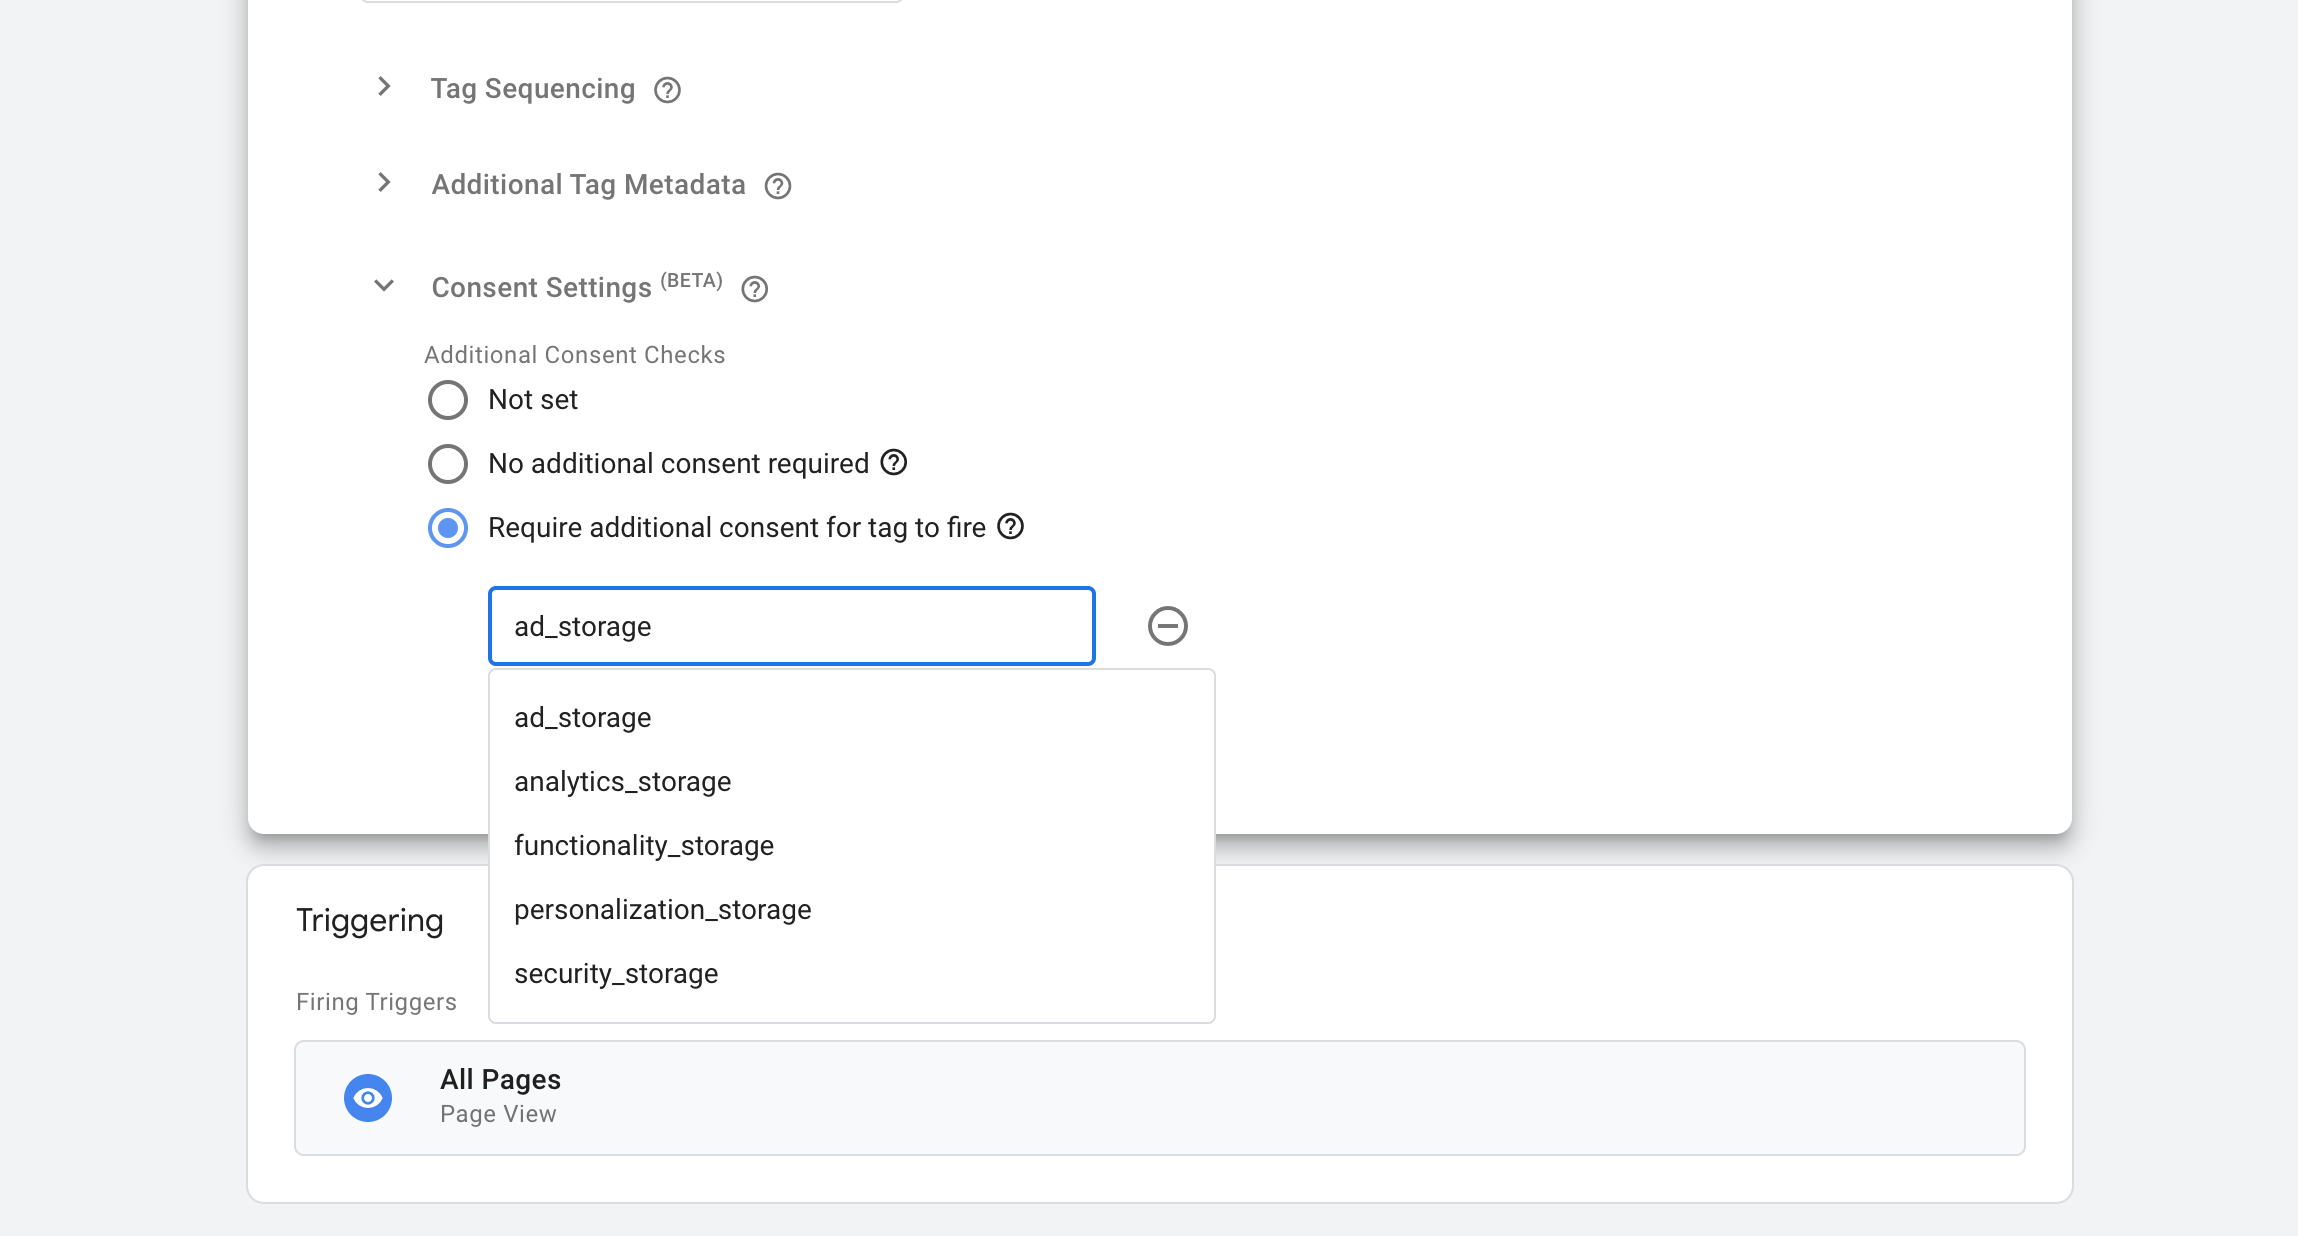
4. Consent Mode V2 avanzato per i tag Google
Consent Mode V2 Advanced Consent Mode allows website owners to tailor tag and cookie behaviours based on various consent states. In Advanced Consent Mode, Google Tags load before your consent banner appears. The consent banner collects the user’s consent status, which is then detected by Consent Mode and communicated to your Google Tags, enabling them to adjust their behaviour accordingly.
Tipi di consenso predefiniti di Google Tag Manager
Per abilitare l'archiviazione nel browser (come i cookie) relativa alla pubblicità.
Per abilitare i cookie pubblicitari a impostare il consenso all'invio di dati personali ai servizi della piattaforma principale di Google.
Per abilitare l'uso dei dati personali a fini pubblicitari, come il remarketing o il targeting basato sugli interessi.
Per abilitare l'archiviazione nel browser (come i cookie) relativa all'analisi, ad es. la durata della visita.
Per abilitare l'archiviazione nel browser che supporta le funzionalità del sito web o dell'app, ad es. le impostazioni della lingua.
Per abilitare l'archiviazione nel browser relativa alla personalizzazione.
Per abilitare l'archiviazione nel browser relativa alla sicurezza, come le funzionalità di autenticazione, la prevenzione delle frodi e altre forme di protezione degli utenti. Gli utenti verranno informati sulle specifiche finalità di archiviazione nella dichiarazione dei cookie, ma questo tipo non richiede il consenso dell'utente finale.